在笔记本电脑屏幕上显示树莓派串口屏只需五个步骤
1. 计算机网络设置
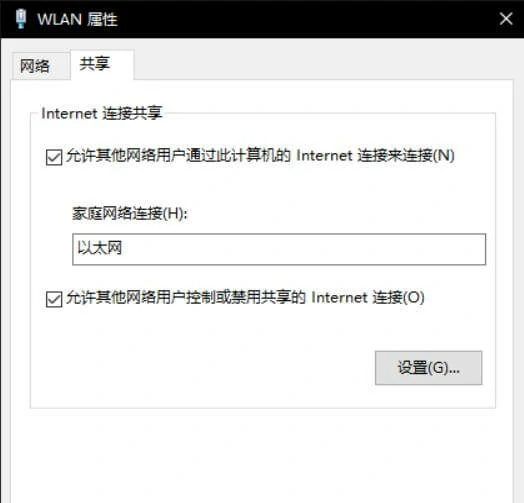
要在 Windows 中通过以太网与多个用户共享互联网,请转到“网络和共享中心”。然后选择已连接的 Wi-Fi,右键点击“属性”->; 在面板中选择“共享”,并勾选“共享互联网连接”前的第一个复选框。
如果家庭网络连接通过网线连接,请选择本地连接。如果我的电脑连接到 Wi-Fi,则默认为本地连接。
2. Raspberry Pi 显示设置
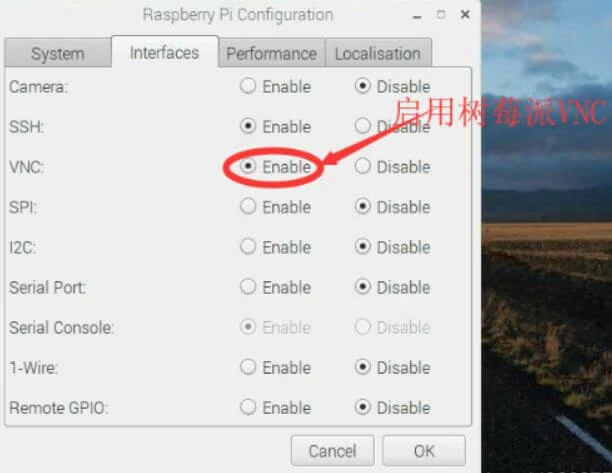
启动 Raspberry Pi VNC 服务
VNC 在 Raspberry Pi 上默认关闭,因此在安装新 Raspbian 后打开 Raspberry Pi 时需要启用它。
首先,通过菜单进入 Raspberry Pi 的配置界面。

然后转到“接口”选项卡,启动 VNC 并重启 Raspberry Pi。
.
3. Raspberry Pi 屏幕已安装 VNC
在终端中使用以下命令安装 VNC 服务器:
sudo apt-get install tightvncserver
sudo apt-get update
安装完成后,使用以下命令启动 VNC:
vncserver: 1
随后 Raspberry Pi 将显示其 IP 地址
4. 笔记本电脑配置
下载 VNC 服务器和 VNC 客户端
VNC 连接由 VNC 服务器和 VNC 客户端组成
下载 VNC 服务器并注册一个免费账户
随后下载 VNC 客户端并登录

在图像中输入 Raspberry Pi 的 IP 地址
输入
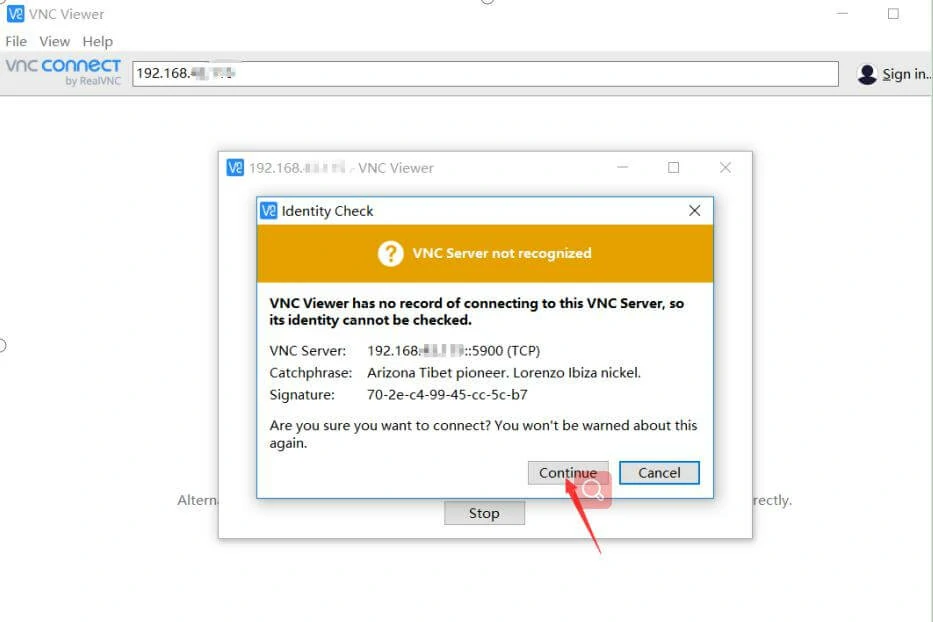
选择连接并输入 Raspberry Pi 的登录用户名和密码。
初始用户名:PI
初始密码:Raspberry
5. 设置 Raspberry Pi 自动无线连接到电脑屏幕
只要 Raspberry Pi 未重启,即可通过 VNC 远程连接到 Raspberry Pi。若需 Raspberry Pi 重启时自动运行 VNC 服务器,请执行以下操作:
开始配置:
首先,
sudo nano /etc/init.d/vncserver
然后复制以下内容并右键粘贴到其中
以下是一些内联代码片段。
#!/bin/sh
### BEGIN INIT INFO
# Provides: vncserver
# Required-Start: $local_fs
# Required-Stop: $local_fs
# Default-Start: 2 3 4 5
# Default-Stop: 0 1 6
# Short-Description: Start/stop vncserver
### END INIT INFO
# More details see:
# http://www.penguintutor.com/linux/vnc
### Customize this entry
# Set the USER variable to the name of the user to start vncserver under
export USER='pi'
### End customization required
eval cd ~$USER
case "$1" in
start)
# Start the command line.Customize the resolution, console number, or other parameters here.
su $USER -c '/usr/bin/vncserver -depth 16 -geometry 1024x768 :1'
echo "Starting VNC server for $USER "
;;
stop)
# Terminate the command line. The console number here is the same as the boot.
su $USER -c '/usr/bin/vncserver -kill :1'
echo "vncserver stopped"
;;
*)
echo "Usage: /etc/init.d/vncserver {start|stop}"
exit 1
;;
esac
exit 0
然后按 Ctrl+O 保存文件
然后按 Ctrl+X 退出文本编辑器
然后更改权限
sudo chmod 755 /etc/init.d/vncserver
然后添加启动项
sudo update-rc.d vncserver defaults
最后重启 Raspberry Pi
sudo reboot
下次重启 Raspberry Pi 时,VNC 服务器将自动启动,并无缝连接到笔记本电脑屏幕上的 Raspberry Pi 串口屏并为其供电。然后打开 VNCViewer,输入 Raspberry Pi 的 IP 地址,即可使用笔记本电脑的串口屏作为 Raspberry Pi 的串口屏。